Authentik + NPM(Nginx) + Cloudflare 로 백엔드에 대한 인증 적용

Vultr를 이용하여 authentik, ghost를 설치하였습니다.
그리고 여기에 직접 구현한 backend app들을 추가하고 있습니다. 그런데 이 backend app들에 대해서는 지금 인증이 필요합니다. 누구에게나 보일 정보가 아니기 때문이죠
그래서 이를 구성하게 되었고, 그 과정을 정리해봅니다.
사전 준비사항
- Authentik 서비스 (https://login.idecl.net)
- Websocket 통신 적용 필요, 가급적이면 https 사용
- Cloudflare에 도메인 등록. ex) *.idecl.net
- NPM에 Letsencrypt 인증서 발급 - *.idecl.net
구성하기
- Proxy Provider를 구성합니다
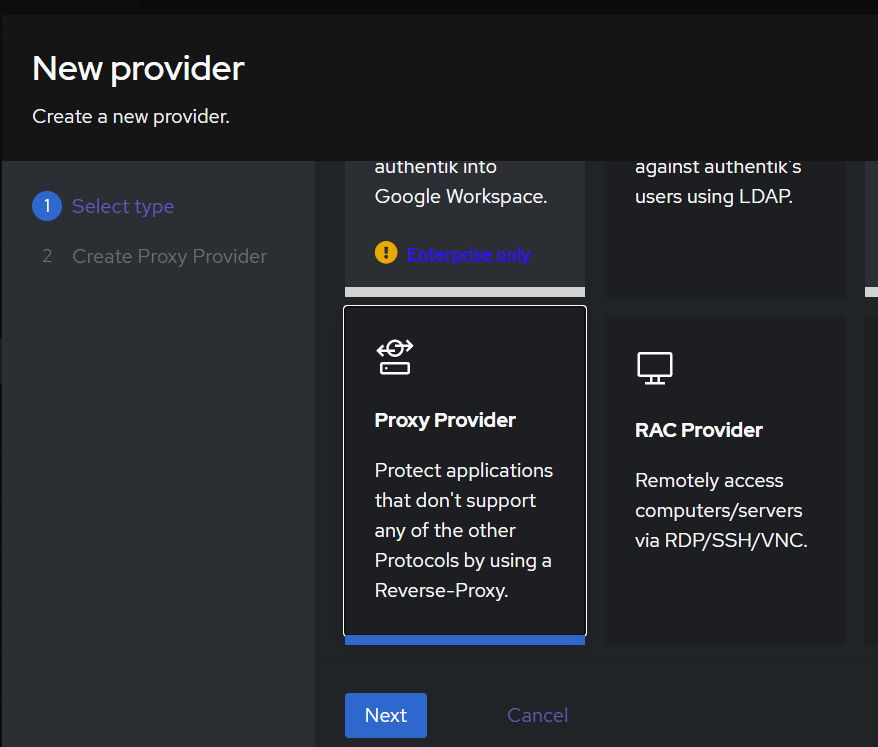
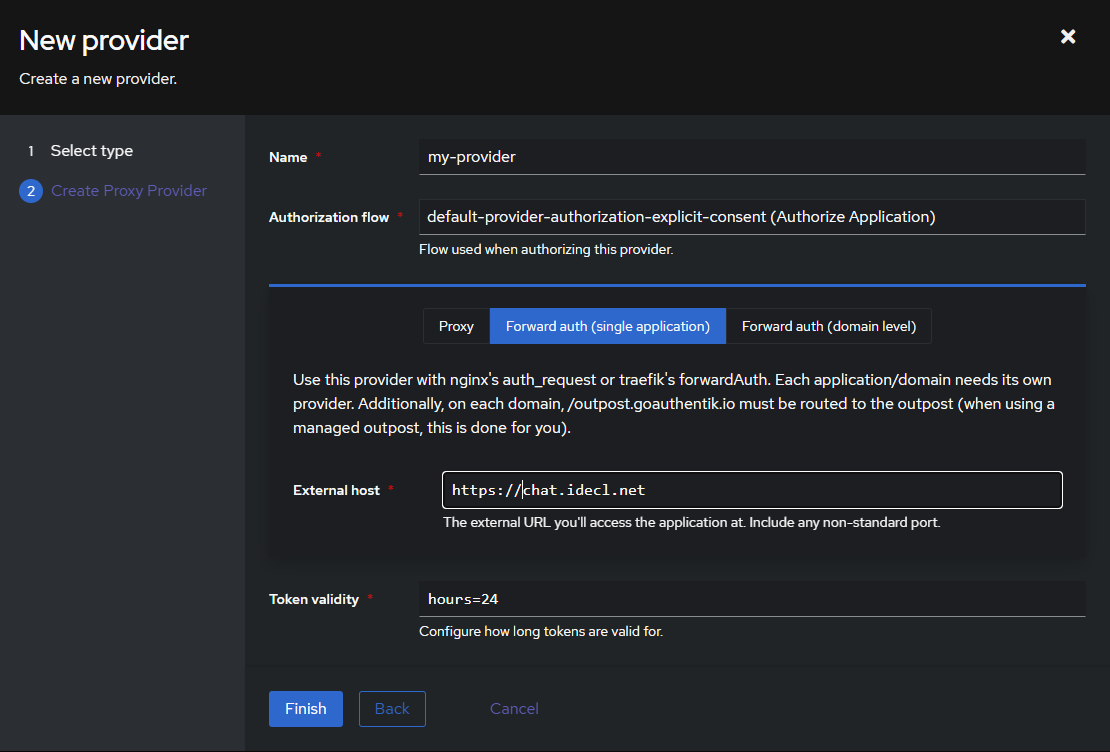
- Name : my-provider
# 인증을 적용할 서비스마다 provider가 생성될 예정이라 구분 가능하게

- Authorization flow: default-provider-authorization-explicit-consent (Authorize Application)
# 이 플로우는 인증 과정에서 사용자가 애플리케이션이 자신의 정보를 액세스하는 것을 명확하게 승인해야 하는 경우에 사용됩니다. 보통 OAuth/OIDC 환경에서 권한 위임(Authorization Grant) 을 처리할 때 필요한 과정입니다.

- Forward Auth(Single Application)
# Forward Authentication(포워드 인증)은 Authentik을 역방향 프록시(Reverse Proxy) 앞에서 인증 게이트웨이처럼 사용하는 방식입니다. 특히, Single Application 모드는 하나의 특정 애플리케이션에 대해 인증을 강제하는 방식

- External Host
# 적용할 서비스의 도메인
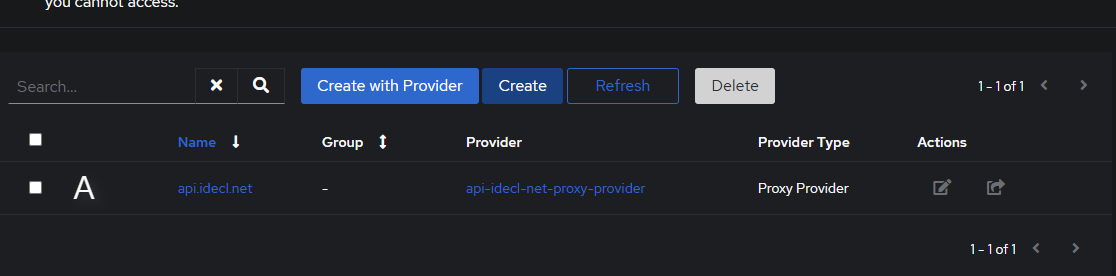
- Application 등록
Create with Provider가 아닌 Create 선택
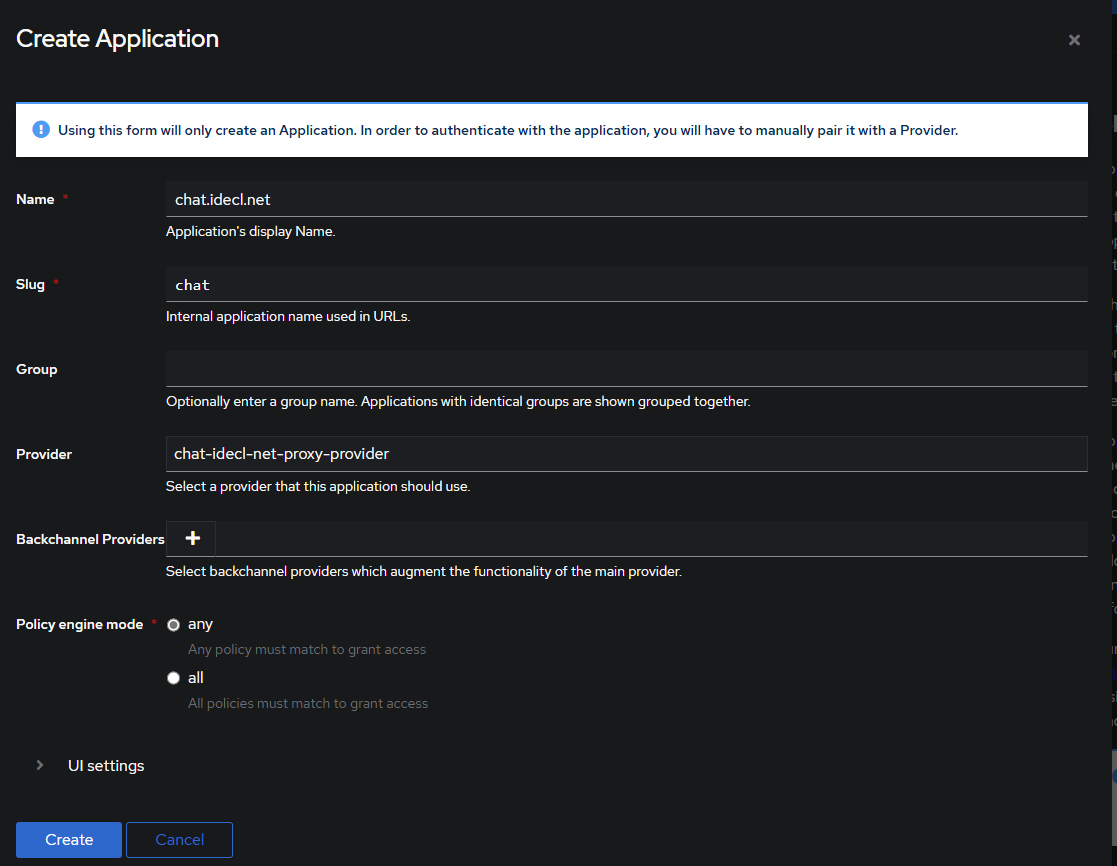
- Name
# 자유롭게 입력한다. 보통 도메인을 입력하는게 직관적

- Slug
# 마찬가지로 도메인에서 가져옴

- Provider
# 앞서 만들었던 Provider 선택- Outpost 갱신하기
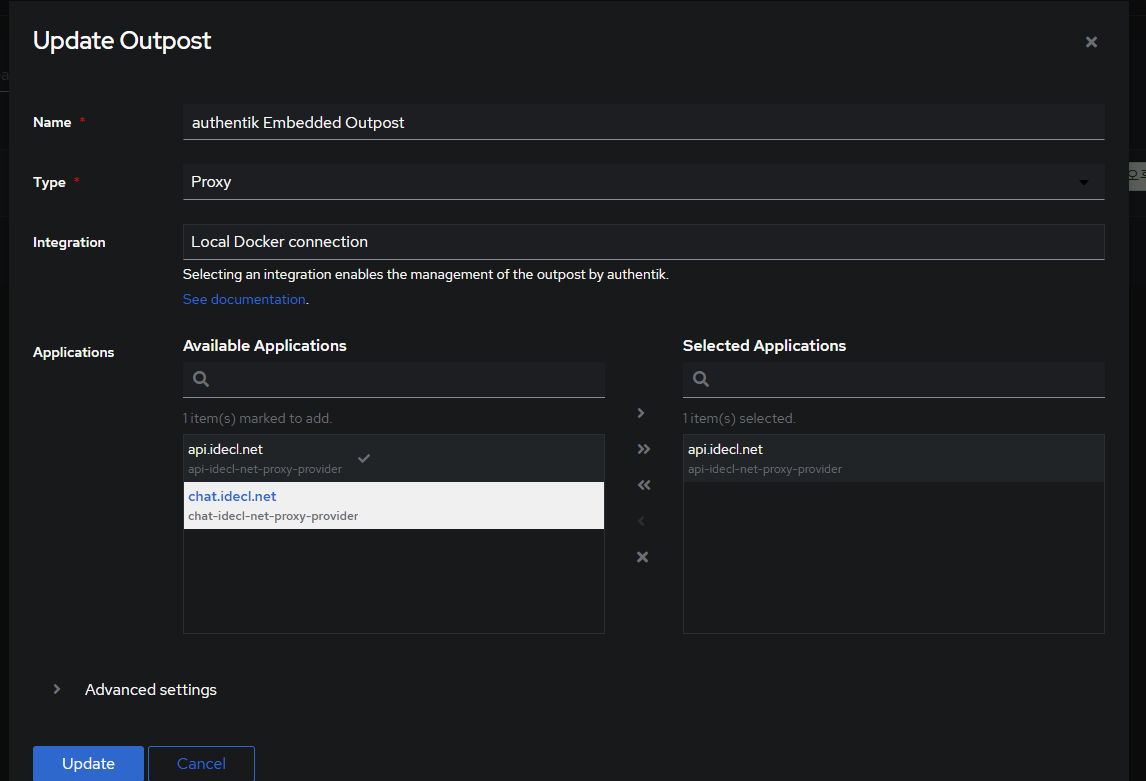
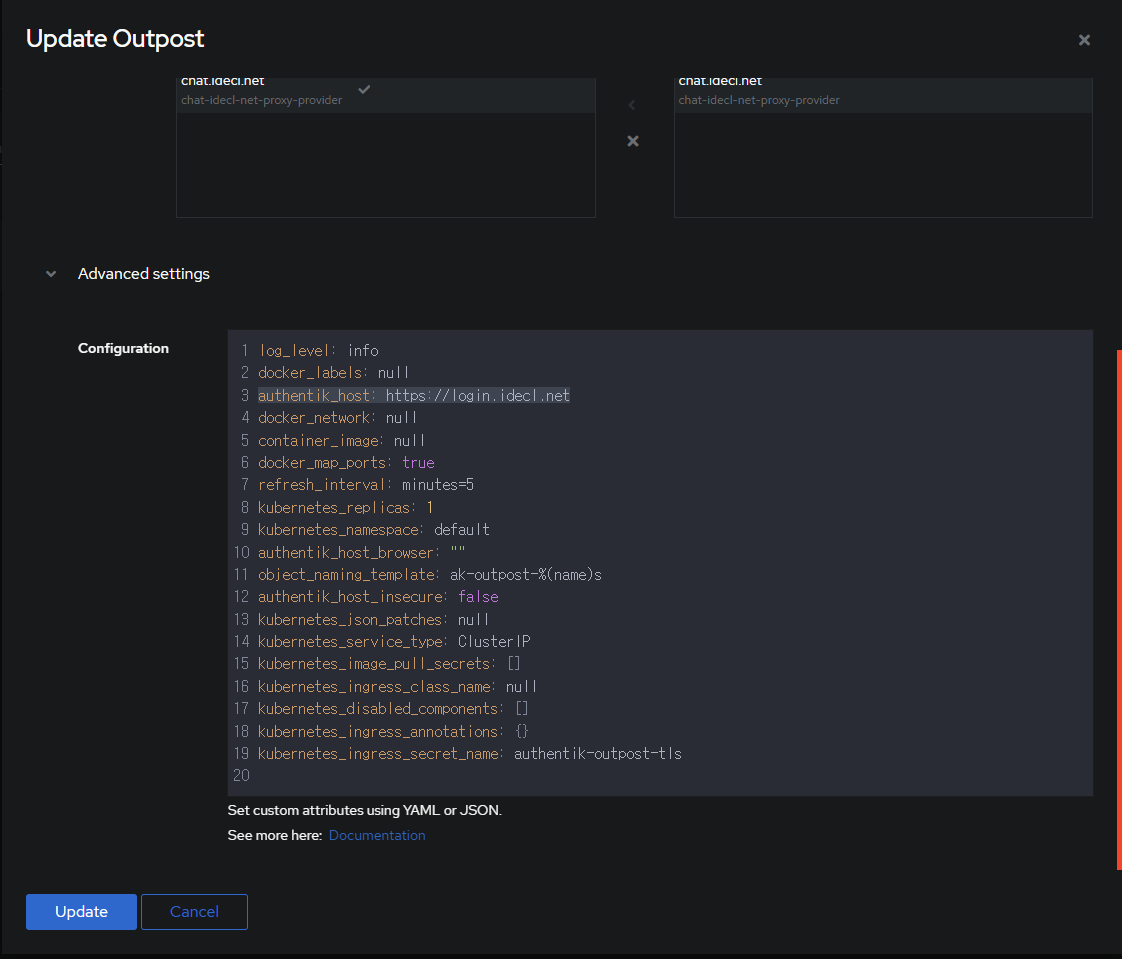
- Outpost는 이미 등록된 것을 수정하는 것인데, Applicatoin을 등록할때마다 선택을 해줘야 합니다
- Advanced Settings에서 authentik_host의 경우 outpost를 맨처음 수정할때 한번만 해주면 됩니다. login을 할 authentik 도메인을 입력하기 때문이죠
- NPM 구성

- Websocket을 설정합니다

- 만들었던 인증서를 지정합니다. (그외 옵션들은 필요하면 선택)
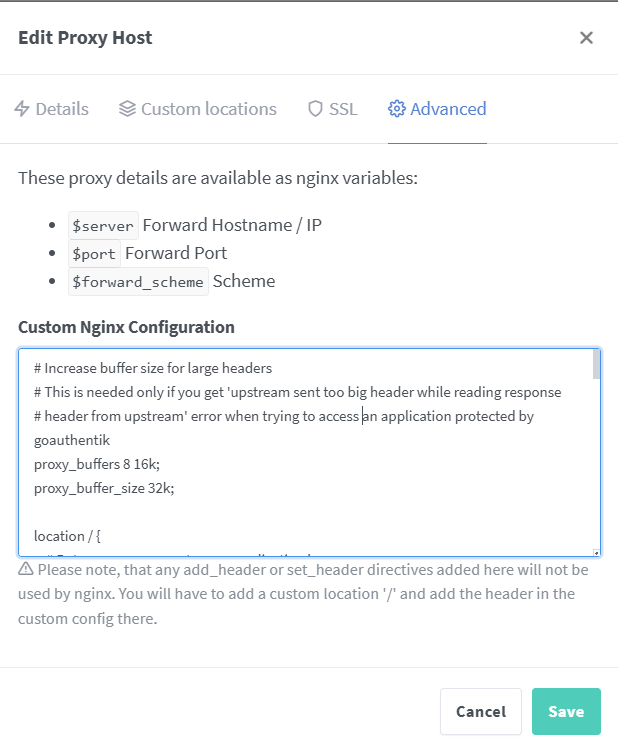
# Increase buffer size for large headers
# This is needed only if you get 'upstream sent too big header while reading response
# header from upstream' error when trying to access an application protected by goauthentik
proxy_buffers 8 16k;
proxy_buffer_size 32k;

location / {
    # Put your proxy_pass to your application here
    proxy_pass          $forward_scheme://$server:$port;

    # authentik-specific config
    auth_request        /outpost.goauthentik.io/auth/nginx;
    error_page          401 = @goauthentik_proxy_signin;
    auth_request_set $auth_cookie $upstream_http_set_cookie;
    add_header Set-Cookie $auth_cookie;

    # translate headers from the outposts back to the actual upstream
    auth_request_set $authentik_username $upstream_http_x_authentik_username;
    auth_request_set $authentik_groups $upstream_http_x_authentik_groups;
    auth_request_set $authentik_email $upstream_http_x_authentik_email;
    auth_request_set $authentik_name $upstream_http_x_authentik_name;
    auth_request_set $authentik_uid $upstream_http_x_authentik_uid;

    proxy_set_header X-authentik-username $authentik_username;
    proxy_set_header X-authentik-groups $authentik_groups;
    proxy_set_header X-authentik-email $authentik_email;
    proxy_set_header X-authentik-name $authentik_name;
    proxy_set_header X-authentik-uid $authentik_uid;
}

# all requests to /outpost.goauthentik.io must be accessible without authentication
location /outpost.goauthentik.io {
    proxy_pass          https://수정이 필요/outpost.goauthentik.io;
    # ensure the host of this vserver matches your external URL you've configured
    # in authentik
    proxy_set_header     X-Forwarded-Host $host;
    proxy_set_header    X-Original-URL $scheme://$http_host$request_uri;
    add_header          Set-Cookie $auth_cookie;
    auth_request_set    $auth_cookie $upstream_http_set_cookie;

    # required for POST requests to work
    proxy_pass_request_body off;
    proxy_set_header Content-Length "";
}

# Special location for when the /auth endpoint returns a 401,
# redirect to the /start URL which initiates SSO
location @goauthentik_proxy_signin {
    internal;
    add_header Set-Cookie $auth_cookie;
    return 302 /outpost.goauthentik.io/start?rd=$request_uri;
    # For domain level, use the below error_page to redirect to your authentik server with the full redirect path
    # return 302 https://authentik.company/outpost.goauthentik.io/start?rd=$scheme://$http_host$request_uri;
}- 수정이 필요 라고 되어 있는 부분을 수정해야 합니다.
- npm 입장에서 authentik에 접근하기 위한 URL이 해당됩니다.
- 보통 npm과 authentik은 같은 node에 있기 때문에 컨테이너 통신을 위한 IP 대역이 있는데 그것을 입력하면 됩니다. 예를 들어 npm은 172.17.0.3 이고 authentik이 172.17.0.5로 할당되어 있다면 172.19.0.4:9443를 입력하게 됩니다.
- 참고로 :9443은 https이기 때문에 그에 맞게 프로토콜도 https로 해야 합니다. 이게 불일치 하면 500 에러를 만나게 됩니다
이렇게 하면 이제 해당 서비스 접근 시 authentik에 인증이 되어 있지 않으면 강제로 로그인 페이지로 전송이 되고, 로그인을 하여야만 웹서비스 이용이 가능해집니다.